상대 레이아웃 사용하기
상대 레이아웃은 다른 뷰나 부모 뷰와의 상대적인 위치를 이용해 뷰를 배치하는 방법
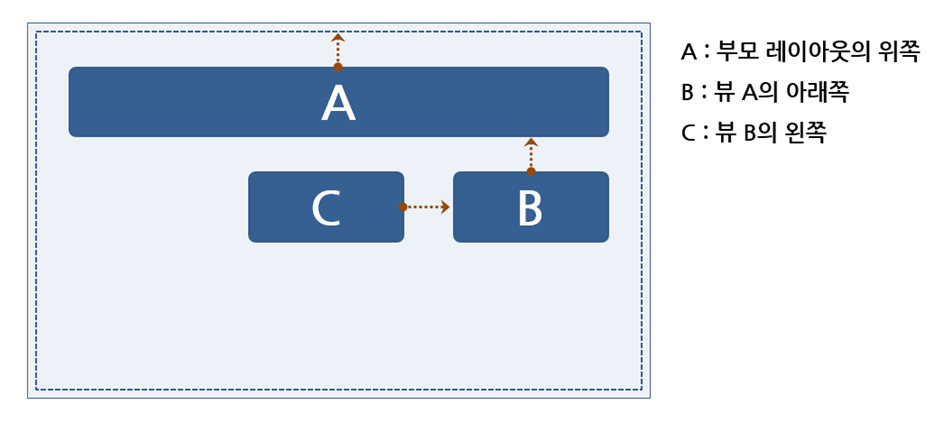 상대 레이아웃 화면 배치
- XML 레이아웃 파일에서 가운데 하나, 아래쪽에 하나 배치

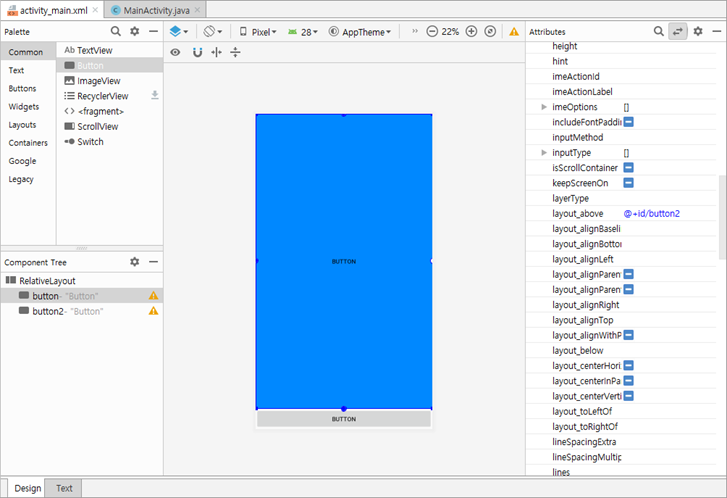
상대 레이아웃의 속성 사용
<?xml version="1.0" encoding="utf-8"?>
<RelativeLayout xmlns:android="http://schemas.android.com/apk/res/android"
    android:layout_width="match_parent"
    android:layout_height="match_parent" >

    <Button
        android:id="@+id/button"
        android:layout_width="match_parent"
        android:layout_height="match_parent"
        android:layout_alignParentLeft="true"
        android:layout_alignParentStart="true"
        android:layout_alignParentTop="true“
        android:layout_above="@+id/button2"
        android:text="Button"
        android:background="#ff0088ff"/>

   <Button
        android:id="@+id/button2"
        android:layout_width="match_parent"
        android:layout_height="wrap_content"
        android:text="Button"
        android:layout_alignParentBottom="true"
        android:layout_alignParentLeft="true"
        android:layout_alignParentStart="true" />
</RelativeLayout>
상대 레이아웃 화면 배치
- XML 레이아웃 파일에서 가운데 하나, 위와 아래쪽에 하나씩 배치

상대 레이아웃에서 사용할 수 있는 속성들
- 상대 레이아웃에서 부모 컨테이너와의 상대적 위치를 이용하는 속성


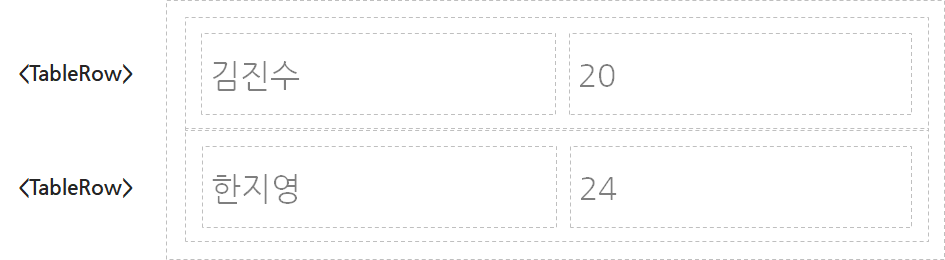
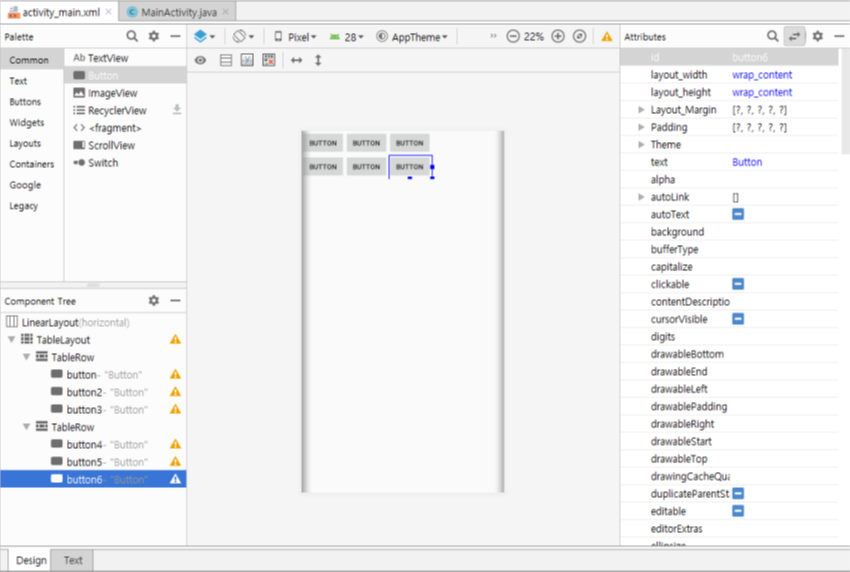
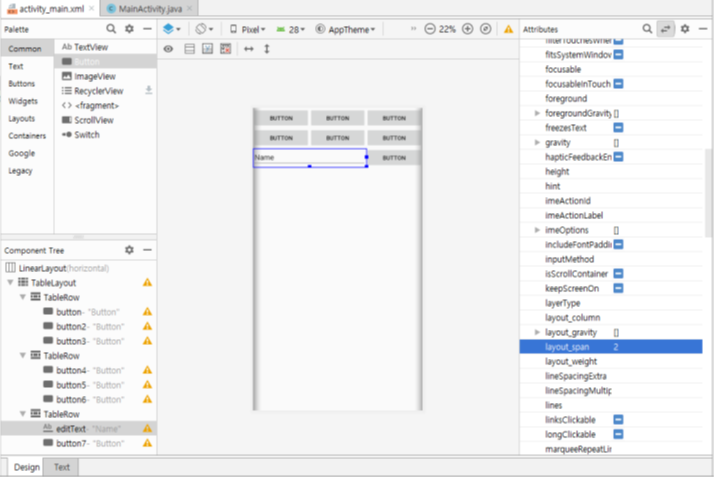
테이블 레이아웃 사용하기
- 테이블 레이아웃은 격자 모양으로 뷰를 배치하는 방법
<?xml version="1.0" encoding="utf-8"?>
<TableLayout xmlns:android="http://schemas.android.com/apk/res/android"
    android:layout_width="match_parent"
    android:layout_height="match_parent" >

    <TableRow
        android:layout_width="match_parent"
        android:layout_height="match_parent" >

        <Button
            android:id="@+id/button3"
            android:layout_width="wrap_content"
            android:layout_height="wrap_content"
            android:text="Button" />
...
<EditText
android:id="@+id/editText"
android:layout_width="wrap_content"
android:layout_height="wrap_content"
android:layout_span="3" />

․․․

<Button
android:id="@+id/button"
android:layout_width="wrap_content"
android:layout_height="wrap_content"
android:layout_column="2"
android:text="아니오" />

․․․
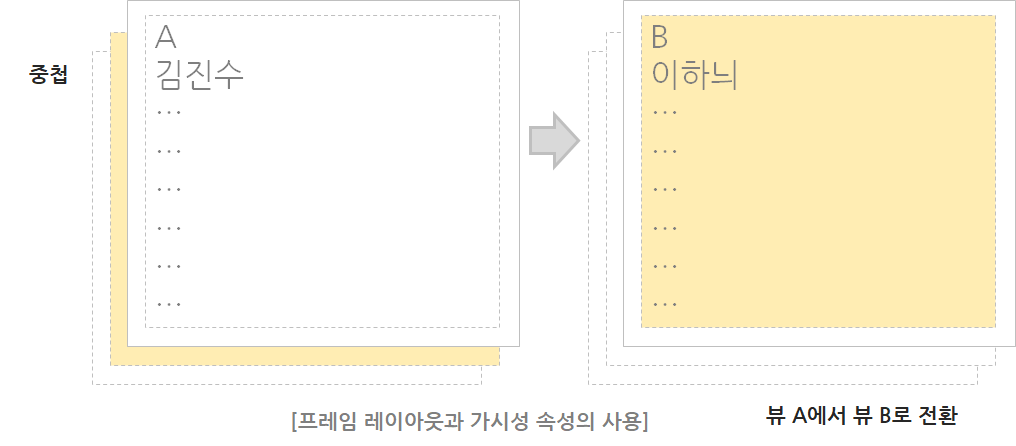
프레임 레이아웃과 뷰의 전환
- 한 번에 하나의 뷰만 보여주며, 다른 뷰들은 그 아래에 중첩되어 쌓임
- 중첩되는 효과와 함께 뷰의 가시성(Visibility) 속성을 이용해 다양한 화면 구성이 가능함
사용 예 – XML 레이아웃
<LinearLayout
    android:id="@+id/layout1"
    android:layout_width="match_parent"
    android:layout_height="match_parent"
    android:orientation="vertical"
    android:visibility="gone"
    >
    <TextView
        android:layout_width="match_parent"
        android:layout_height="match_parent"
        />
</ScrollView>
사용 예 – 소스 코드
layout1.setVisibility(View.GONE);
layout1.setVisibility(View.VISIBLE);
layout1.setVisibility(View.INVISIBLE);
프레임 레이아웃과 뷰의 전환
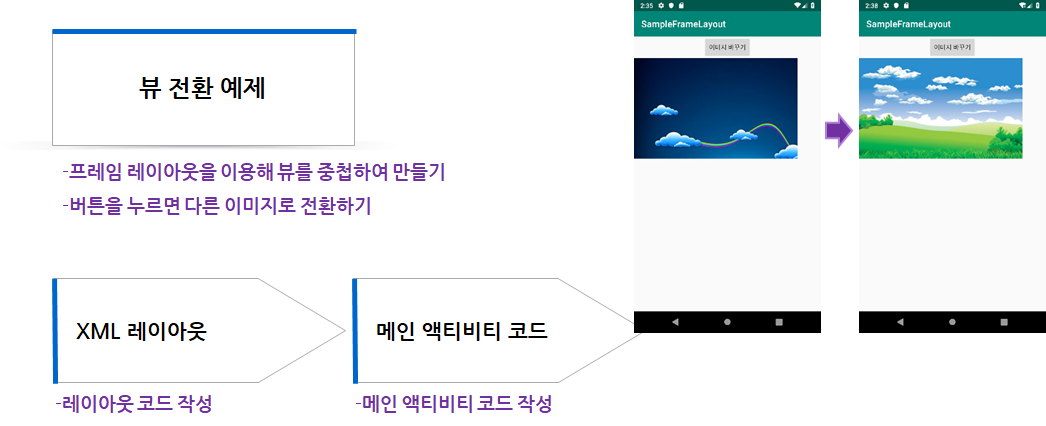
XML 레이아웃
<LinearLayout xmlns:android="http://schemas.android.com/apk/res/android"
android:orientation="vertical"
android:layout_width="match_parent"
android:layout_height="match_parent"
>
<Button
android:id="@+id/button"
android:layout_width="wrap_content"
android:layout_height="wrap_content"
android:layout_gravity="center"
android:text="이미지 바꾸기"
/>
<FrameLayout
android:layout_width="match_parent"
android:layout_height="match_parent"
>
<ImageView
android:id="@+id/imageView"
android:layout_width="wrap_content"
android:layout_height="wrap_content"
android:src="@drawable/dream01"
android:visibility= "invisible"
/>
<ImageView
android:id="@+id/imageView2"
android:layout_width="wrap_content"
android:layout_height="wrap_content"
android:src="@drawable/dream02"
android:visibility= "visible"
/>
</FrameLayout>
</LinearLayout>
메인 액티비티 코드
private void changeImage() {
  if(imageIndex == 0) {
    imageView1.setVisibility(View.VISIBLE);
    imageView2.setVisibility(View.INVISIBLE);
    imageIndex = 1;
  } else if (imageIndex == 1) {
    imageView1.setVisibility(View.INVISIBLE);
    imageView2.setVisibility(View.VISIBLE);
    imageIndex = 0;
  }
}
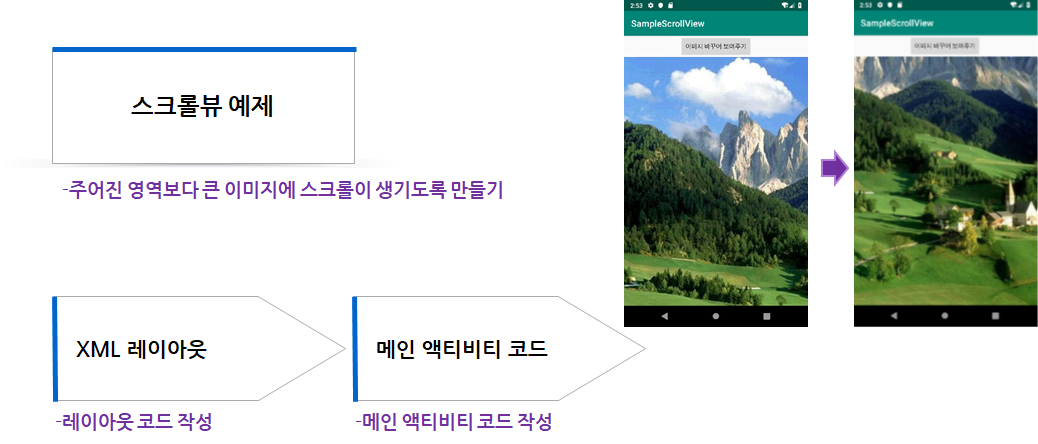
스크롤뷰 사용하기
- 위젯의 내용이 화면 영역을 벗어나면 스크롤 표시가 자동으로 보임
- 스크롤뷰를 이용해 다른 뷰를 감싸주기만 하면 됨

사용 예–텍스트뷰를 스크롤뷰로 감싸주는 경우
<ScrollView
    android:layout_width="match_parent"
    android:layout_height="match_parent"
    >
    <TextView
        android:id="@+id/textView"
        android:layout_width="match_parent"
        android:layout_height="match_parent"
        />
</ScrollView>
XML 레이아웃
    android:onClick="onButton1Clicked"
    />

    <HorizontalScrollView
        android:id="@+id/horScrollView"
        android:layout_width="match_parent"
        android:layout_height="match_parent“ >
        <ScrollView
            android:id="@+id/scrollView"
            android:layout_width="match_parent"
            android:layout_height="match_parent“ >
            <ImageView
                android:id="@+id/imageView"
                android:layout_width="wrap_content"
                android:layout_height="wrap_content"
                />
메인 액티비티 코드
…
scrollView = (ScrollView) findViewById(R.id.scrollView);
imageView = (ImageView) findViewById(R.id.imageView);
…
scrollView.setHorizontalScrollBarEnabled(true);
Resources res = getResources();
BitmapDrawable bitmap = (BitmapDrawable)
res.getDrawable(R.drawable.system_architecture);
int bitmapWidth = bitmap.getIntrinsicWidth();
int bitmapHeight = bitmap.getIntrinsicHeight();
imageView.setImageDrawable(bitmap);
imageView.getLayoutParams().width = bitmapWidth;
imageView.getLayoutParams().height = bitmapHeight;
…